This guide walks you through creating a Lasso Pro API token in CRM and launching the AWS Labs OpenAPI MCP Server against it. Any agentic environment that speaks MCP can then call the same Lasso Pro API described on the API page.
You need a Lasso login with Project Admin on the project you want to expose, plus an MCP host that can run a local uvx command (Cursor, Claude Code, Claude Desktop, Windsurf, and similar).
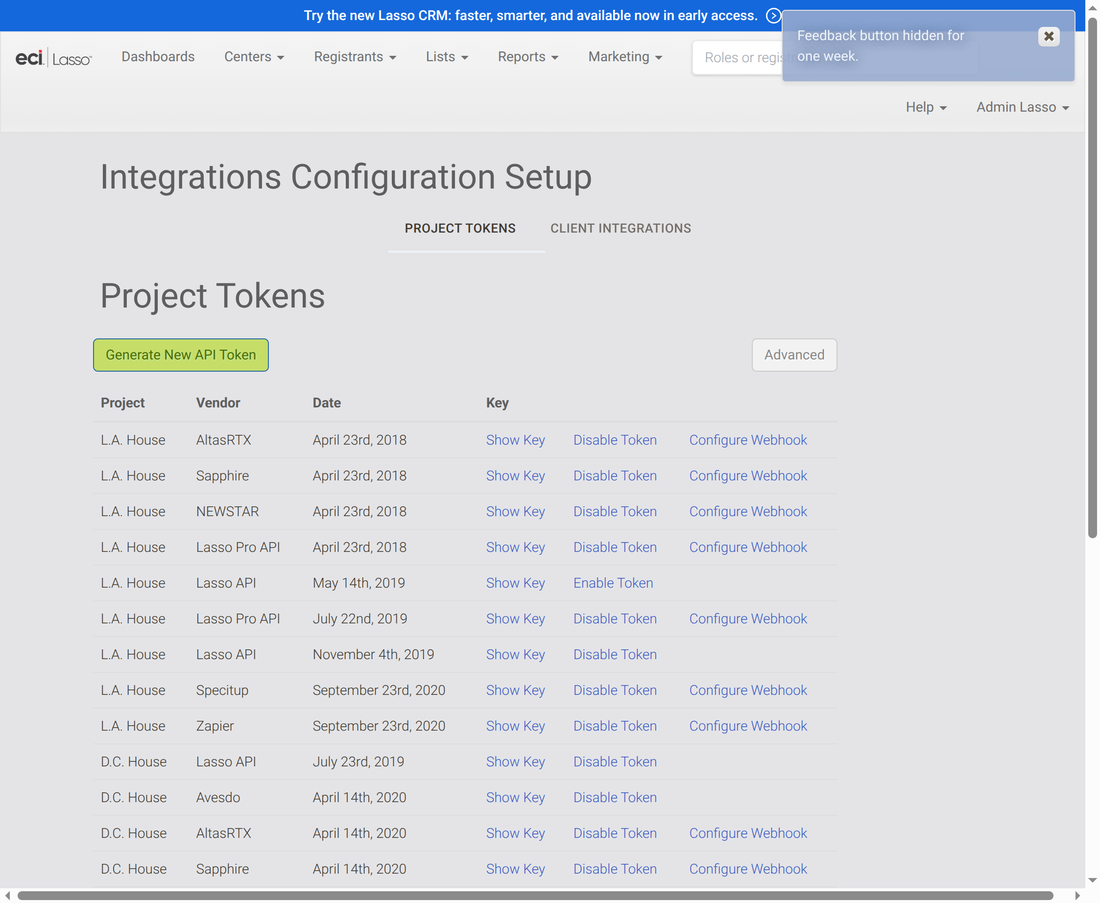
LASSO_PRO_API_KEY. Paste the JWT as-is — no Bearer prefix.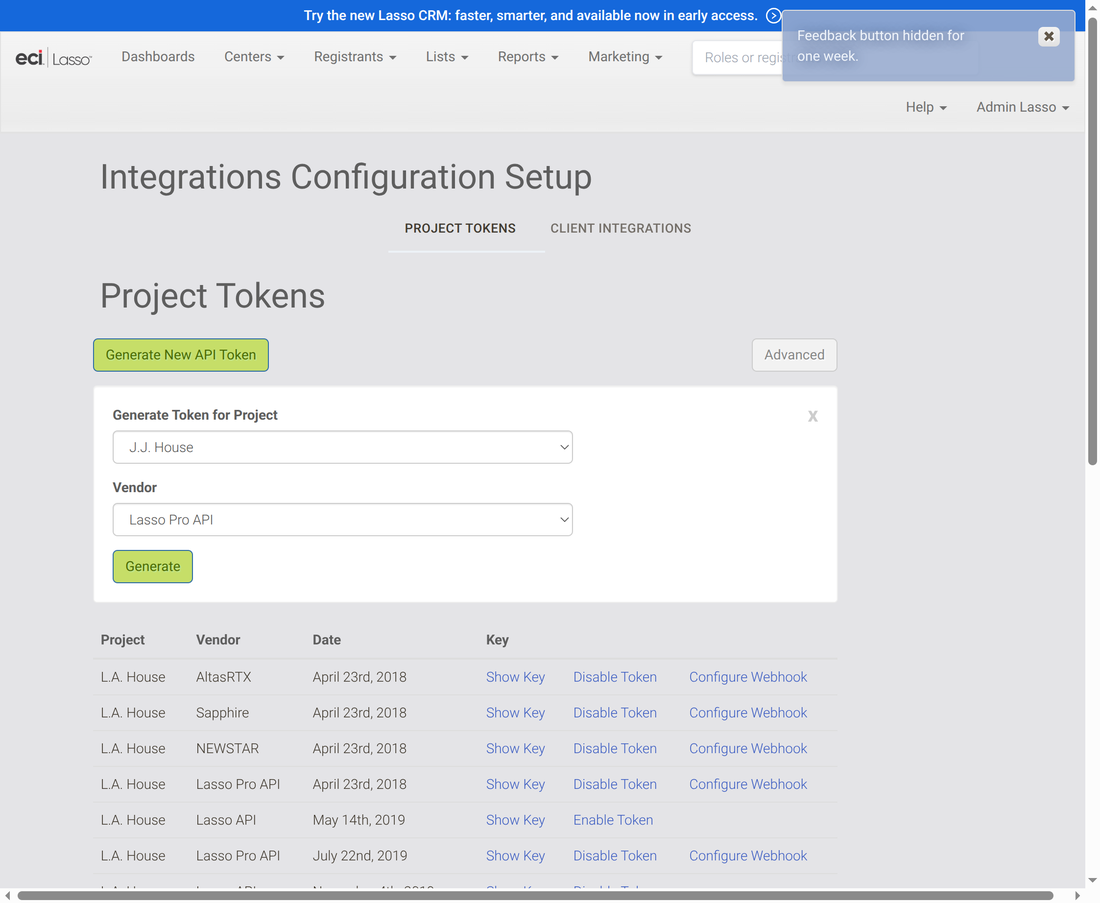
The AWS Labs server is launched with uvx, which ships with uv. On macOS or Linux:
curl -LsSf https://astral.sh/uv/install.sh | shRestart the terminal (and the MCP host) so uvx is on your PATH. Confirm with uvx --version.
Every host gets the same stdio recipe. The file you edit and the way you reference LASSO_PRO_API_KEY are the only client-specific bits — that is how AWS Labs and the MCP clients themselves document this.
| Command | uvx |
|---|---|
| Args | awslabs.openapi-mcp-server@latest (pin a version such as @1.1.6 if you do not want it to move on every launch) |
API_NAME | lasso-pro |
API_BASE_URL | https://api.lassocrm.com/v1 |
API_SPEC_URL | https://platform.lassocrm.com/api/lasso.yml |
AUTH_TYPE | bearer |
AUTH_TOKEN | your Lasso Pro API token (or the host’s env interpolation for LASSO_PRO_API_KEY) |
Put this block in whatever file your host uses for MCP servers (often named mcp.json, .mcp.json, or claude_desktop_config.json). Windsurf, Kiro, and most others accept this mcpServers shape. VS Code Copilot uses a servers key in .vscode/mcp.json instead — same command, args, and env.
{
  "mcpServers": {
    "lasso-pro": {
      "command": "uvx",
      "args": ["awslabs.openapi-mcp-server@latest"],
      "env": {
        "API_NAME": "lasso-pro",
        "API_BASE_URL": "https://api.lassocrm.com/v1",
        "API_SPEC_URL": "https://platform.lassocrm.com/api/lasso.yml",
        "AUTH_TYPE": "bearer",
        "AUTH_TOKEN": "<your Lasso Pro API token>"
      }
    }
  }
}
Prefer an environment variable over pasting the token.
User-wide: ~/.cursor/mcp.json. Project-only: .cursor/mcp.json. Or Settings → MCP.
{
  "mcpServers": {
    "lasso-pro": {
      "command": "uvx",
      "args": ["awslabs.openapi-mcp-server@latest"],
      "env": {
        "API_NAME": "lasso-pro",
        "API_BASE_URL": "https://api.lassocrm.com/v1",
        "API_SPEC_URL": "https://platform.lassocrm.com/api/lasso.yml",
        "AUTH_TYPE": "bearer",
        "AUTH_TOKEN": "${env:LASSO_PRO_API_KEY}"
      }
    }
  }
}
Project-shared: .mcp.json at the repo root. User-wide: claude mcp add --scope user (writes ~/.claude.json).
claude mcp add --transport stdio \
  --env API_NAME=lasso-pro \
  --env API_BASE_URL=https://api.lassocrm.com/v1 \
  --env API_SPEC_URL=https://platform.lassocrm.com/api/lasso.yml \
  --env AUTH_TYPE=bearer \
  --env 'AUTH_TOKEN=${LASSO_PRO_API_KEY}' \
  --scope user \
  lasso-pro -- uvx awslabs.openapi-mcp-server@latest
Single quotes keep the shell from expanding the token when you run the command. The same server as JSON:
{
  "mcpServers": {
    "lasso-pro": {
      "type": "stdio",
      "command": "uvx",
      "args": ["awslabs.openapi-mcp-server@latest"],
      "env": {
        "API_NAME": "lasso-pro",
        "API_BASE_URL": "https://api.lassocrm.com/v1",
        "API_SPEC_URL": "https://platform.lassocrm.com/api/lasso.yml",
        "AUTH_TYPE": "bearer",
        "AUTH_TOKEN": "${LASSO_PRO_API_KEY}"
      }
    }
  }
}
macOS: ~/Library/Application Support/Claude/claude_desktop_config.json. Windows: %APPDATA%\Claude\claude_desktop_config.json. Put the token in AUTH_TOKEN in that file.
{
  "mcpServers": {
    "lasso-pro": {
      "command": "uvx",
      "args": ["awslabs.openapi-mcp-server@latest"],
      "env": {
        "API_NAME": "lasso-pro",
        "API_BASE_URL": "https://api.lassocrm.com/v1",
        "API_SPEC_URL": "https://platform.lassocrm.com/api/lasso.yml",
        "AUTH_TYPE": "bearer",
        "AUTH_TOKEN": "<your Lasso Pro API token>"
      }
    }
  }
}This token can create, update, and delete project data, not only read it. Leave your host’s tool-approval prompts on.
The token is a project-scoped bearer credential for https://api.lassocrm.com/v1. The live OpenAPI description is https://platform.lassocrm.com/api/lasso.yml.
If something in this flow does not match what you see in Lasso, Contact Us